5 Minute Teriyaki Snapper & Rice


Today I am sharing you a very fast 5 minute meal. I am not usually a big "fast meal" maker. But this week is Thanksgiving, I am in the middle of about 6 jobs and I am very pressed for time. Thanks to Rice n Simple, I got to try out their all-natural, premium cooked rice that raises the standards for instant microwaveable meals. It cooks in just one minute and the various sauces that come with each bowl are exceptionally delicious and can make it look like you have been slaving away in the kitchen all day! 

Rice n Simple is a young company that is dedicated to providing its customers with an option for enhanced energy, flexibility and creativity by offering the highest quality rice in addition to the most deliciously flavored sauces for a healthy lifestyle. Rice n Simple was established on the philosophy that being healthy and eating healthy is essential to living a balanced, simple and harmonious life. The company strives to connect with its customers through one of the simplest things life has to offer, quality food; and with the simplest nutrient rich food in the world, rice.

Available in both white jasmine rice and brown rice, Rice n Simple has created super healthy rice meals with incredible sauces that add mouthwatering taste to its already flavorful rice. And at a very affordable price, Rice n Simple provides quick & easy, yet super healthy rice bowls. The rice itself is of the highest quality, imported from Thailand and selected for its delicious flavor, unique texture and naturally distinctive aroma.

Rice n Simple is available for purchase at select Kroger locations in the US as well as at www.amazon.com for just MSRP $2.49 per 7oz meal. With delicious sauces including naturally brewed Soy Sauce, lush Shiitake Mushroom Glaze and a yummy flavored Teriyaki Glaze, the rice can also be utilized in any recipe, including those listed at www.RicenSimple.com.


For this recipe you only need a few simple ingredients. 

5 Minute Teriyaki Snapper & Rice
serves 2

1 Tbsp. Olive Oil
Rice n Simple jasmine rice with teriyaki glaze
2 6 ounce fillets of wild caught red snapper
Sea Salt and freshly grated pepper to taste. 


Start out with a non stick pan or cast iron skillet, and heat it over medium high heat.

Salt and pepper the snapper on both sides to taste.
Add 1 Tbsp. Olive oil to the hot pan and swirl to coat. 

Add your snapper. Cook for 2 minutes, then flip. 
Cut the Teriyaki glaze sachet and squirt it on the cooked side of the fish, being careful not to get it in the pan. Cook for another 2 minutes. 

While finishing up cooking open your rice containers. 
Remove the film completely and cook on high for 1 minute for each container. 

Serve the fish over rice with your favorite sauteed vegetables. 

Christmas Caprese Salad


Here at Nan’s, one of our favorite summer foods is a Caprese salad, especially the heirloom tomatoes with a balsamic drizzle.  Of course in winter heirloom tomatoes are long gone, but that does not mean the idea of a tomato salad has to go away.  Cherry or Roma tomatoes are plentiful and usually good quality.  Here is a simple and beautiful holiday side dish inspired by the classic Caprese. The red tomatoes and fresh green basil make this holiday salad a stand out on the table. You can prepare the balsamic dressing ahead to save time.


for the salad:

  • 2 pints cherry tomatoes, halved.  Chopped Roma tomatoes will also work.
  • 1 bunch fresh basil, thinly sliced (chiffonade) 
  • 1 pound fresh mozzarella pearls (or fresh mozzarella diced into bite-size pieces)

for the balsamic brown sugar reduction:


In a sauce pan over medium-low heat add the balsamic vinegar and the brown sugar. Cook for 3-5 minutes until bubbly and thick. Once reduced, it should be able to coat the back of a spoon. Allow to cool.


Add the halved tomatoes and fresh mozzarella pearls to a bowl. Before serving, add the fresh basil and drizzle the reduction over the salad.  Toss.


Serves 6 to 8.

Scallops with Leek Grenobloise


For those of you just tuning in, I have exciting news! I was just offered a book deal. I am writing Gourmet Cooking for two, the cookbook! 


So things are getting a little hectic for me. I write for a lot of publications, have just finished up writing my other book "Gluten-free made easy" that will be available June of 2014, and now this book that will be available to purchase at costco, barnes and noble, amazon and so many more places August of 2014! Exciting!


Bear with me during this time. Since I plan on bringing you 100 recipes that you have not seen before, I will be busy busy busy and not able to post here as often as I would like. 

Now on to today's food. 
My husband absolutely loves seared scallops. I am not a big fan. I can handle one. After that it is just far to rich for me. I still try to make them for him often. This version was nice and light and full of citrus flavor. 

Scallops with Leek Grenobloise
slightly adapted from Food and Wine

2 tablespoons extra-virgin olive oil
1 pound sea scallops
sea salt
Freshly ground pepper
2 tablespoons butter
1 medium leek—trimmed, halved and thinly sliced
2 tablespoons drained capers
2 teaspoons fresh lemon juice, plus lemon wedges for serving
2 tablespoons chopped flat-leaf parsley

In a large nonstick skillet, heat the olive oil. Season the scallops with salt and pepper and cook over moderately high heat until golden brown on the bottom 4 minutes. 
Now you are going to do what I like to call the "flip and tap". Turn the scallops over and cook for about 30 seconds just enough to make the scallops opaque throughout. Transfer to a platter and keep warm.

Melt the butter in the skillet. Add the sliced leek and capers and cook over high heat, stirring, until the leek is crisp-tender, 2 minutes. Stir in the lemon juice and parsley and season with salt and pepper. Spoon the leek around the scallops and garnish with lemon.

    New England Clam Chowder from scratch


    There is something powerful about the moonlight. I think Kenny Chesney got it right in the song "When the sun goes down". Everything truly does get hotter. Most of the time, we snuggle in and don't bother going out in the moonlight. Occasionaly, we get out there and it is almost always magical. Especially along the water. Seeing the moon reflect off the water is a peaceful romantic thing. I highly recommend you get out there and experience it with your love. 

    Romantic Tip: Take a moonlit walk on the beach, bay, lake, or any other romantic place.

    Getting on the water for us, almost always means we will stop at the Brig for our favorite New England Clam Chowder. I have yet to find a better chowder here in San Diego. So I decided to learn how to make it from scratch like them at home. That's right. I mean completely from scratch. No canned clams here. It is actually easy, so don't be intimidated. 

    New England Clam Chowder from scratch

    2 pounds fresh clams 
    1/2 cup fresh water
    1/2 tablespoon extra virgin olive oil
    2 ounces bacon cut into 1/8 in. slices
    1/2 medium onion minced
    1 tablespoon flour
    1 1/2 cups milk
    1/2 lb. potatoes of your choice cut into small cubes
    1/2 teaspoon fresh marjoram minced
    1 bay leaf
    2 Tbsp butter

    The day before: As soon as you bring your clams home from the store wash the clams with cold water and then put the clams in a bowl with enough salt water to cover the clams ( it should taste like the sea). 
    Put the bowl in your refrigerator. Over the next 24 hours your clams will do their thing and siphon in the clean water expelling most of the grit they hold between their shells. If your clams are really dirty, you may need to change the water periodically.

    In a wide pot or sauté pan with a lid, add the clams along with 1/2 cup fresh water. Cover and steam over medium high heat until all the clams have opened. 5 - 10 minutes. Remove the pot from the heat and uncover. 

    Remove the clam meat from the shells and transfer to a bowl. Discard any unopened clams. Once all the clams have been shelled, slowly pour the clam stock over the clams, leaving the last tablespoon or so of stock along with any grit in the pot. Wash the pot out. 

    Agitate the clam mixture to allow any sand to settle to the bottom of the bowl, then let it sit for a minute to allow all the sand to settle to the bottom. Use your fingers or a slotted spoon to scoop the clams off the top of the liquid being careful not to disturb the sand at the bottom. Once you have all the meat separated, give the stock a few minutes to settle, then slowly pour the clam stock into a 2 cup liquid measuring cup, leaving the last bit of stock and any grit behind. You should have 2 cups clam juice, if you have less, add water to make 2 cups. 
    Add the olive oil and bacon to the clean pot and fry until most of the fat has rendered from the bacon and it is starting to brown ( but not until its crisp). 
    Add the onions and sauté until the are tender and browned. Add the flour and continue frying for 1 minute. 

    Turn off the heat, then add the clam stock and milk. Whisk together to dissolve the roux, and then add the potatoes, marjoram and bay leaf. Put the pot over medium heat and bring the pot to a low simmer. Do not let the soup boil. 

    When the potatoes are tender, remove the bay leaf and return the clams to the pot. Once the clams have reheated the soup is done.

    Apples On Piggyback


    When is the last time you stopped and reflected on the things you love about your partner? Putting all negative traits behind,  you should really write down what you absolutely love. An example for me is I love how hard working my husband is. He is not lazy and does his best each day to provide for us. 


    I think it is so important to focus on the positive, and having it written down as a reminder is a very uplifting thing for both of you.

    Romantic Tip: Make a list of the top 10 things you love about your partner.

    Now on to today's recipe. Apples on Piggyback are a great combination of sweet, tart and savory. They are simple, delicious hors d’oeuvres that you can make in no time to impress your love. Or take them to a party, but make sure to double the recipe, because these go fast!


    Apples On Piggyback

    4 thin slices of bacon, cut in half.
    1 Green Apple—peeled and cut into 8 wedges
    2 ounces Manchego cheese, sliced 1/4 inch thick and cut into 2-by-1/2-inch sticks
    8 toothpicks, for skewers


    Preheat a grill pan.
     I cooked mine in the oven on a grill pan, so I preheated the oven to high broil. You can make them in the oven, or on the grill.  
    Arrange the bacon slices on a work surface and place an apple wedge and a cheese stick in the center of each slice. 
    Wrap the bacon around the filling and secure with a toothpick.

    Cook skewers until the bacon is golden and crispy and the cheese is melted, 5 to 6 minutes.
     Serve hot.

    Dark Chocolate Chip Cookies


    Love, Romance, and Chocolate go together. Nowadays, scientists ascribe the aphrodisiac qualities of chocolate,to two chemicals it contains. One, tryptophan, is a building block of serotonin, a brain chemical involved in sexual arousal. The other, phenylethylamine, a stimulant related to amphetamine, is released in the brain when people fall in love. The darker the chocolate, the more of these magic chemicals it contains. 

    So when I set out to make some crunchy chocolate chip cookies for my man. I used enjoy life foods dark chocolate chips
    Their Dark Chocolate Morsels are dairy, soy and gluten-free, but you would never know it. So rich, creamy, and scrumptious! Just because they are good for you, doesn't mean they are lacking in taste. I highly recommend them. They made these cookies irresistible. 


    Dark Chocolate Chip Cookies
    makes 1 dozen
    8 1/2 ounces organic unbleached white flour (about 1 1/2 cups)
    1//2 teaspoon baking soda
    3/4 teaspoon baking powder
    3/4 teaspoon s sea salt
    1/2 cup (5 ounces) unsalted butter, at room temperature
    1/2 cup (5 ounces) light brown sugar
    1/2 cup  (4 ounces) granulated sugar
    1 egg
    1 teaspoon vanilla extract

    Sift together the flour, baking soda, baking powder and salt into a large bowl and set aside.

    Cream together the butter and sugars on medium speed until very light. Add the eggs one at a time, mixing well after each addition, then add the vanilla. Reduce the mixer speed to low, gradually add the dry ingredients and mix until just combined. Using a rubber spatula, fold in the chocolate chips.

    Press plastic wrap against the dough and roll it up. Refrigerate for at least 3 hours, up to 72 hours. If you are in a hurry, you can freeze the dough for 1 hour. 
    When ready to bake, preheat oven to 350 degrees F. Line a baking sheet with parchment paper or a nonstick baking mat.

    Slice the dough into cookie shape and place on your baking sheet or stone leaving plenty of space in between each cookie. 

    Bake until golden brown but still soft, 15 to 18 minutes. 
    Transfer the cookies to a wire rack for 10 minutes,  until just warm or at room temperature. Repeat with remaining dough (or keep some of the dough refrigerated for up to 3 days, and bake cookies at a later time). Store leftover cookies in an airtight container at room temperature for up to 3 days.

    Lasagne Bolognese


    It has been a while since I have put a romantic tip on here, so I thought it was time for one. I think it is important to stay connected to your love during the day. Even though we all work and have responsibilities outside of our relationships. It is still good to make your presence known through the day. Many single guys consider work a safe haven from the minefield of dating and don't want that sacred space violated. In marriage and committed relationships , though, it's different: News from the home front serves as a nice reminder of what you're working for. 

    Romantic tip:  Call your love while at work, or send a mushy email letting them know how much you love them and how much of a turn on it is that they are hard working. Let them know you are excited to be together after work where you can share with each other the events of the day.


    Now on to the food. 
    I love a good lasagna. I also love a good bolognese. Usually bolognese is served with spaghetti. But why not a lasagna? I made this for my man and he went crazy over it. This is time consuming, and I would recommend breaking the process up into two days. Day one make the bolognese. Day two the noodles and bechamel and assemble and bake. 

    This recipe serves 4 because pasta is magnificent leftover. My husband loves to take it to work the next day for lunch and make his office pals jealous with the smells of Italian food.

    Lasagne Bolognese from scratch
    adapted from Bon Appétit | October 2013

    Bolognese sauce:
    1/2 large onion, coarsely chopped
    1/2 medium carrot, peeled, coarsely chopped
    1/2 celery stalk, coarsely chopped
    3 garlic cloves sliced
    1 tablespoon olive oil
    1/2 pound ground beef chuck
    1/2 pound ground pork
    2 ounces pancetta (Italian bacon), finely chopped
    Kosher salt, freshly ground pepper
    1/2 cup dry white wine
    1/2 cup whole milk
    1 14.5-ounce can crushed tomatoes
    1 1/2 cups  chicken broth, divided

    Fresh pasta dough:
    1/2 teaspoon kosher salt
    1 1/2 cups all-purpose flour, plus more
    2 large eggs, room temperature

    Béchamel:
    2 1/2 tablespoons unsalted butter
    1/8 cup all-purpose flour
    2 cups whole milk, warmed
    Kosher salt

    For Assembly:
    1 cup finely grated Parmesan

    Make the Bolognese sauce
    Pulse onion, carrot, and celery in a food processor until finely chopped.
    Heat olive oil in a large heavy pot over medium heat. Add ground beef, ground pork, pancetta, and vegetables; cook, 
    breaking up ground meat with a spoon, until moisture is almost completely evaporated and meat is well browned, 25–30 minutes; season with salt and pepper.

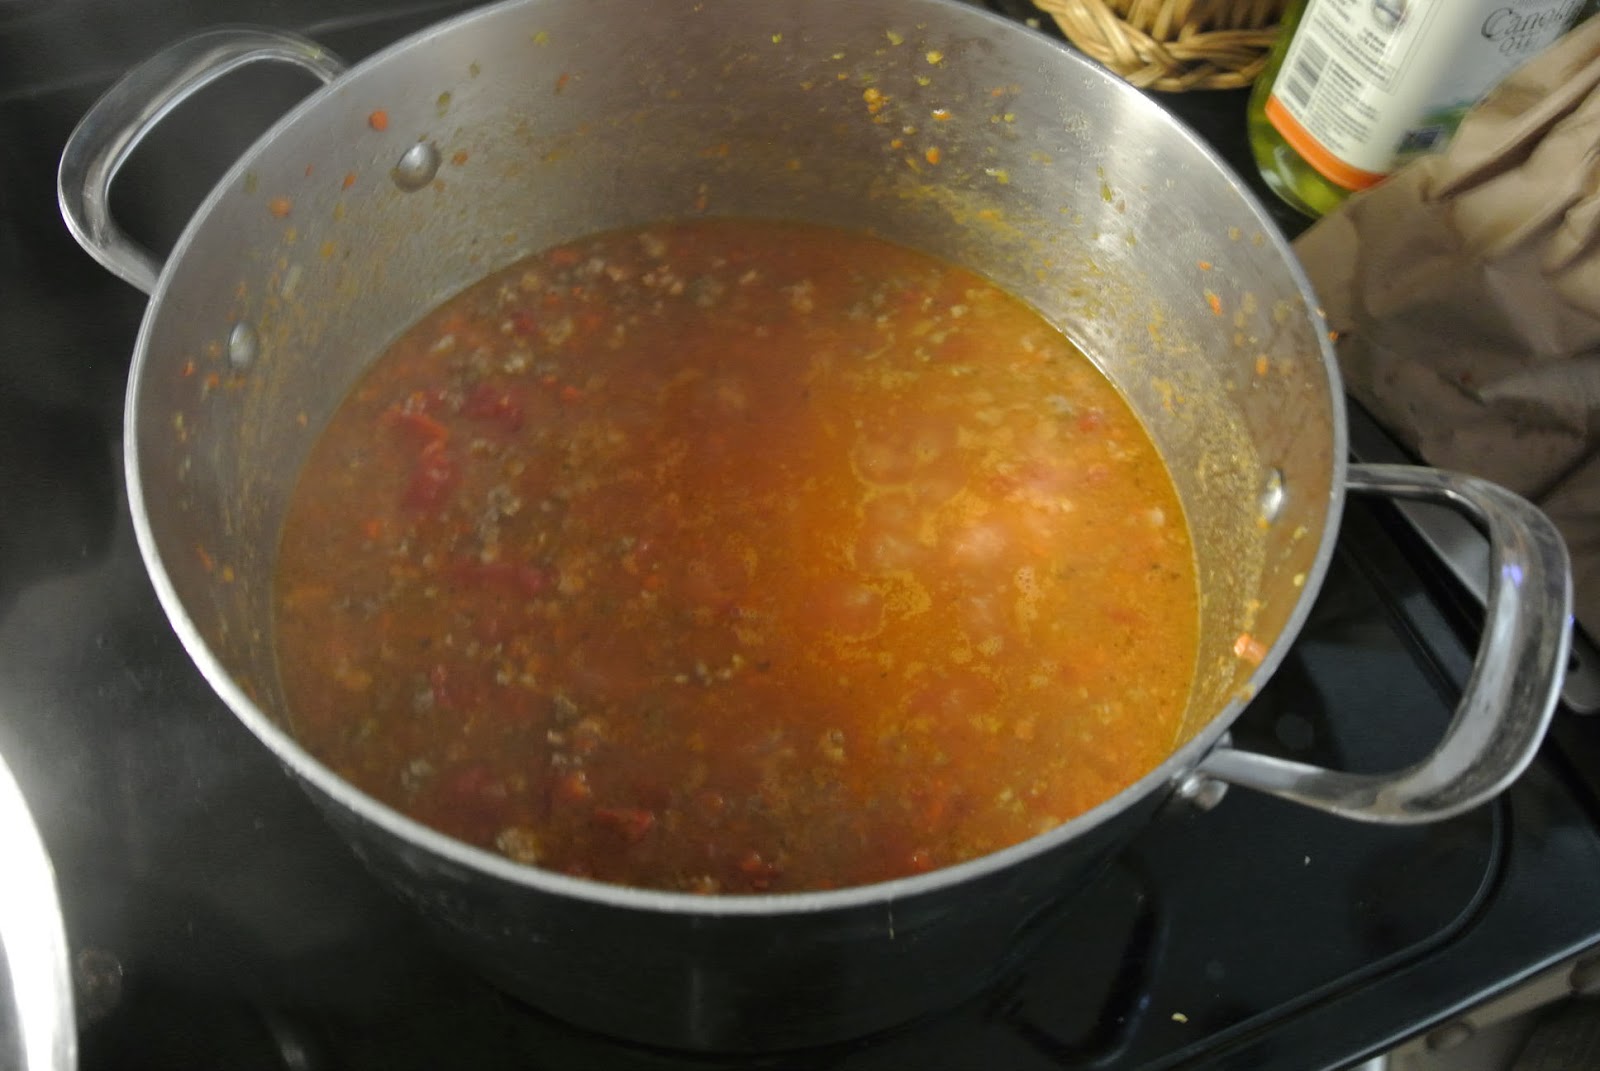
    Add wine to pot and bring to a boil, scraping up browned bits from bottom of pot, about 2 minutes. Add milk; bring to a boil, reduce heat, and simmer until moisture is almost completely evaporated, 8–10 minutes. Add tomatoes and broth; 
    bring to a boil, reduce heat, and simmer, until flavors meld and sauce thickens, 2 1/2–3 hours.

    Let sauce cool, then cover and chill at least 12 hours or up to 2 days. (Letting the sauce sit will give it a deeper, richer flavor.)

    Make the fresh pasta dough:
    Whisk salt and flour in a large bowl, make a well in the center, and crack eggs into well. 
    Mix eggs with a fork, then slowly mix in flour until a shaggy dough forms. Turn out dough onto a lightly floured surface and knead, dusting lightly with flour if sticky, until smooth, about 5 minutes (it will be fairly stiff). Wrap in plastic; let sit until dough holds an indentation when pressed. One hour.
    Chill dough if you are not rolling it out right away. Bring to room temperature before rolling out.

    Set pasta maker to thickest setting; dust lightly with flour. Divide dough into 4 pieces. Working with 1 piece at a time and keeping remaining dough wrapped in plastic as you work, flatten dough into a narrow rectangle (no wider than mouth of machine); pass through rollers . 
    Fold dough as needed to fit and run through again. Repeat without folding, adjusting machine to thinner settings after every pass and dusting with flour if sticky, until pasta sheet is 1/16" thick (setting 8 on most machines). Place pasta sheets on a lightly floured surface and cut crosswise into 8 8"-long noodles.
    If making noodles ahead, stack on a baking sheet with a piece of parchment paper between each layer. Cover with plastic wrap; chill.

    Make the béchamel:
    Heat butter in a medium saucepan over medium heat until foaming. Add flour and cook, whisking constantly, 1 minute. Whisk in warm milk, 1/2-cupful at a time. Bring sauce to a boil, reduce heat, and simmer, whisking often, until the consistency of cream, 8–10 minutes; add nutmeg and season with salt. Remove from heat, transfer to a medium bowl, and press plastic wrap directly onto surface; let cool slightly. 
    Cook the noodles
    Working in batches, cook fresh lasagna noodles in a large pot of boiling salted water until just softened, about 10 seconds. 
    Remove carefully with tongs and transfer to a large bowl of ice water; let cool. Drain noodles and stack on a baking sheet, with paper towels between each layer, making sure noodles don't touch (they'll stick together).

    Preheat oven to 350°F. Coat a 13x9" baking dish with butter.
    Assemble the lasagna:

    Spread 1/4 cup béchamel in the prepared baking dish. Top with a layer of noodles, spread over a scant 3/4 cup Bolognese sauce, then 1/2 cup béchamel, and top with 1/4 cup Parmesan. 
    Repeat process 7 more times, starting with noodles and ending with Parmesan, for a total of 8 layers.
     Place baking dish on a rimmed baking sheet and bake lasagna until bubbling and beginning to brown on top, 50–60 minutes. Let lasagna sit 45 minutes before serving.
    Serve warm.