Showing posts with label seafood. Show all posts

Crispy Snapper with Spicy Basil Sauce


There is no such thing of a couple that does not fight. Even the best, most stable relationships, go through tough times and rough conversations. Pride can get in the way of our relationships thriving. We don't want to back down, until the other person knows we mean business. But is it worth the relationship? Take time to think about that the next time you are so mad steam is coming out your ears. If it is worth ending the relationship over, then by all means, hold our ground. But if it is the regular run of the mill fight. How about swallowing your pride, asking for forgiveness, and then move on to a wonderful evening together. 

Romantic Tip: Be the first to say "I'm sorry" and kiss and make up.


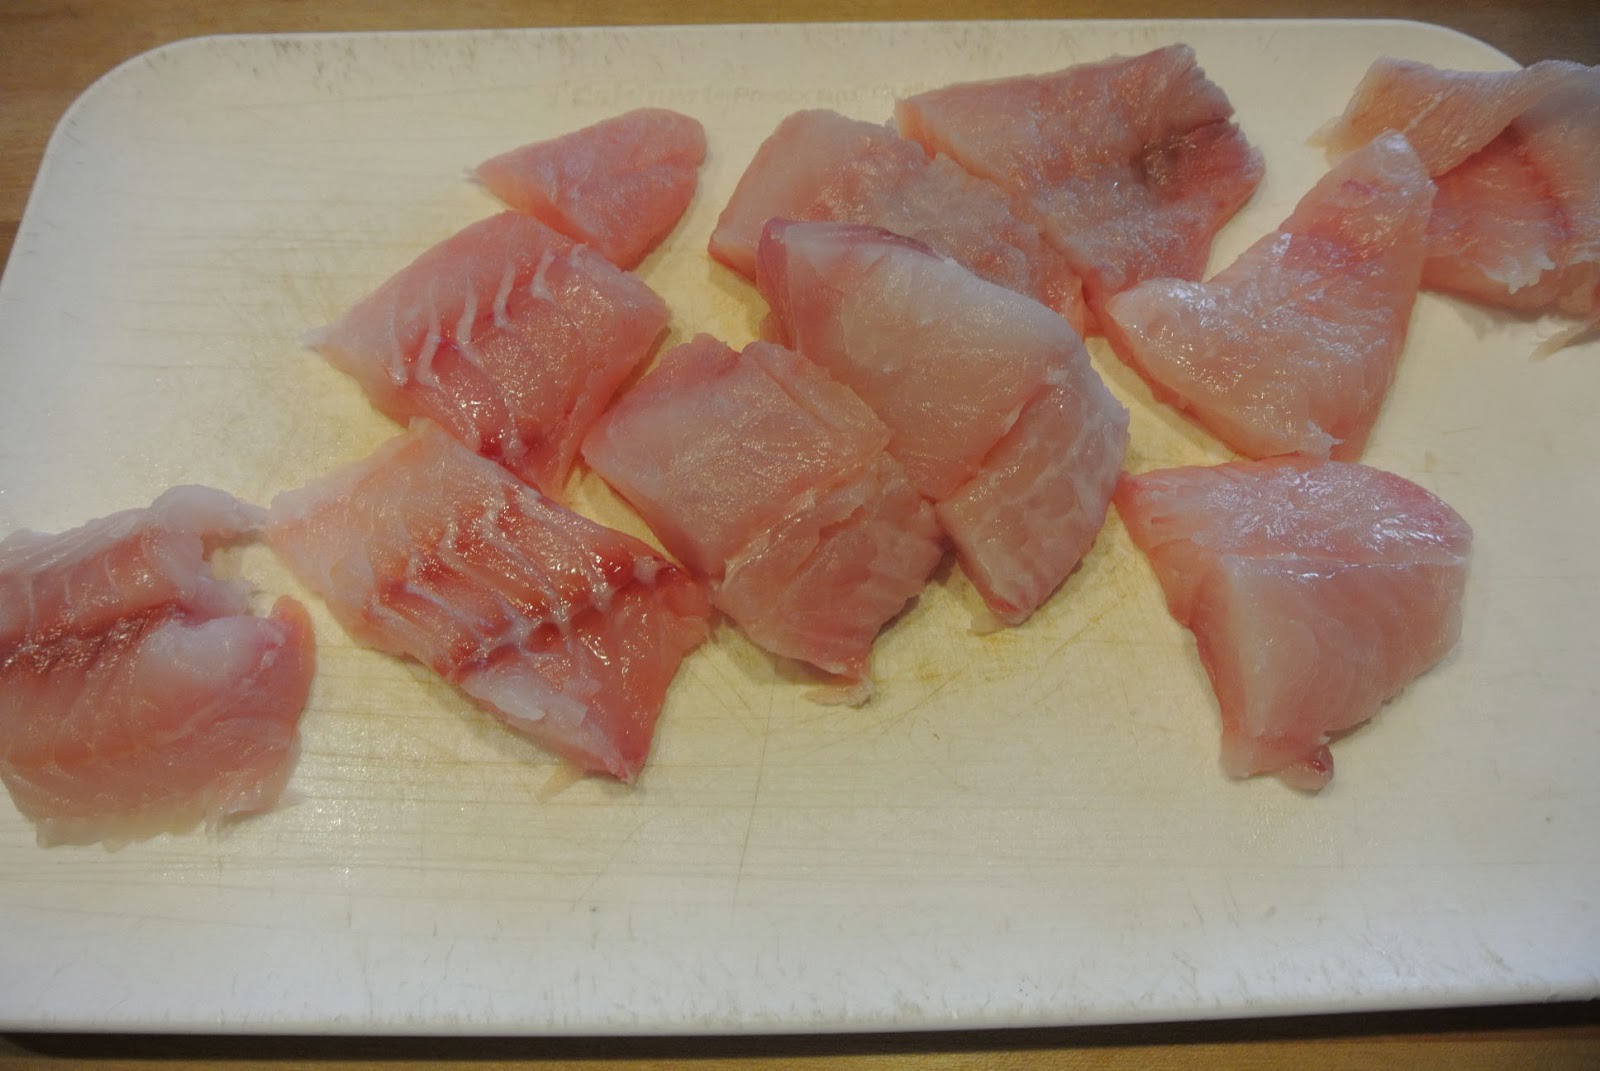
Now on to today's food...I have been cooking a lot o f Red Snapper lately. I love wild caught snapper, and my local organic market has been keeping me very happy with their stock of this gem. I love it because it adapts to any flavors.  

Because my husband absolutely loves all things spice, this dish was perfect. If you are not a big spice fan, you can always use just bell peppers instead of thai chile peppers. We thought it was perfect with the thai chile peppers. Enjoy!


Crispy Snapper with Spicy Basil Sauce

adapted from sel et sucre


2 Snapper fillets  (approx. 8 ounces each)
1/3 cup flour 
3/4 cup panko bread crumbs 
1 Tbsp + 3 Tbsp canola
6 shallots, minced 
4 cloves garlic, minced 
6 thai chile peppers, diced 
1 bell pepper, chopped 
1/4 cup chicken stock 
1/4 cup fish sauce 
2 Tbsp soy sauce
2 Tbsp agave nectar
juice of 1/2 lime 
1 cup Thai basil leaves 
1 egg, beaten with 1 Tbsp water

Pat dry snapper fillets with a paper towel. 
Set up a plate with  flour, a bowl with 1 egg, beaten with 1 Tbsp water, and a plate with 3/4 cup panko breadcrumbs. Dredge each fillet in the flour, followed by the egg wash, followed by the panko breadcrumbs, and set aside. 


In a sautee pan or medium pot, heat 1 Tbsp canola oil over medium-high heat, then sautee  shallots, minced, cloves garlic, minced, chile peppers, sliced, and 1 bell pepper, chopped until the shallots start to darken and the bell pepper is softened, about 5 minutes. 


Add 1/4 cup stock, 1/4 cup fish sauce, 2 Tbsp soy sauce, 2 Tbsp agave nectar, and juice of 1/2 lime, and stir together thoroughly. Bring to a boil, and let simmer until slightly reduced, about 3 – 5 minutes. 
Stir in 1 tsp cornstarch, mixed with 1 tsp cold water, if using, and let simmer until thickened, about 1 – 2 minutes. 


Stir in 1 cup Thai basil leaves, and cook until fragrant, about 1 – 2 minutes, then lower heat to lowest setting to keep warm until ready to serve. 


In a large sautee pan, heat 3 Tbsp canola oil over high heat, then add the coated fish fillets, being careful not to crowd the pan (you will probably need to do a couple of batches). 
Cook the fish until the bottom is crispy and browned, about 3 – 5 minutes. 
Flip the fish, and continue cooking until the other side is crispy and browned, and the fish can be easily flaked with a fork, another 3 – 5 minutes. Remove to a plate lined with paper towels. 
Serve the crispy fish fillets topped with the Thai basil sauce.


    5 Minute Teriyaki Snapper & Rice


    Today I am sharing you a very fast 5 minute meal. I am not usually a big "fast meal" maker. But this week is Thanksgiving, I am in the middle of about 6 jobs and I am very pressed for time. Thanks to Rice n Simple, I got to try out their all-natural, premium cooked rice that raises the standards for instant microwaveable meals. It cooks in just one minute and the various sauces that come with each bowl are exceptionally delicious and can make it look like you have been slaving away in the kitchen all day! 

    Rice n Simple is a young company that is dedicated to providing its customers with an option for enhanced energy, flexibility and creativity by offering the highest quality rice in addition to the most deliciously flavored sauces for a healthy lifestyle. Rice n Simple was established on the philosophy that being healthy and eating healthy is essential to living a balanced, simple and harmonious life. The company strives to connect with its customers through one of the simplest things life has to offer, quality food; and with the simplest nutrient rich food in the world, rice.

    Available in both white jasmine rice and brown rice, Rice n Simple has created super healthy rice meals with incredible sauces that add mouthwatering taste to its already flavorful rice. And at a very affordable price, Rice n Simple provides quick & easy, yet super healthy rice bowls. The rice itself is of the highest quality, imported from Thailand and selected for its delicious flavor, unique texture and naturally distinctive aroma.

    Rice n Simple is available for purchase at select Kroger locations in the US as well as at www.amazon.com for just MSRP $2.49 per 7oz meal. With delicious sauces including naturally brewed Soy Sauce, lush Shiitake Mushroom Glaze and a yummy flavored Teriyaki Glaze, the rice can also be utilized in any recipe, including those listed at www.RicenSimple.com.


    For this recipe you only need a few simple ingredients. 

    5 Minute Teriyaki Snapper & Rice
    serves 2

    1 Tbsp. Olive Oil
    Rice n Simple jasmine rice with teriyaki glaze
    2 6 ounce fillets of wild caught red snapper
    Sea Salt and freshly grated pepper to taste. 


    Start out with a non stick pan or cast iron skillet, and heat it over medium high heat.

    Salt and pepper the snapper on both sides to taste.
    Add 1 Tbsp. Olive oil to the hot pan and swirl to coat. 

    Add your snapper. Cook for 2 minutes, then flip. 
    Cut the Teriyaki glaze sachet and squirt it on the cooked side of the fish, being careful not to get it in the pan. Cook for another 2 minutes. 

    While finishing up cooking open your rice containers. 
    Remove the film completely and cook on high for 1 minute for each container. 

    Serve the fish over rice with your favorite sauteed vegetables. 

    Scallops with Leek Grenobloise


    For those of you just tuning in, I have exciting news! I was just offered a book deal. I am writing Gourmet Cooking for two, the cookbook! 


    So things are getting a little hectic for me. I write for a lot of publications, have just finished up writing my other book "Gluten-free made easy" that will be available June of 2014, and now this book that will be available to purchase at costco, barnes and noble, amazon and so many more places August of 2014! Exciting!


    Bear with me during this time. Since I plan on bringing you 100 recipes that you have not seen before, I will be busy busy busy and not able to post here as often as I would like. 

    Now on to today's food. 
    My husband absolutely loves seared scallops. I am not a big fan. I can handle one. After that it is just far to rich for me. I still try to make them for him often. This version was nice and light and full of citrus flavor. 

    Scallops with Leek Grenobloise
    slightly adapted from Food and Wine

    2 tablespoons extra-virgin olive oil
    1 pound sea scallops
    sea salt
    Freshly ground pepper
    2 tablespoons butter
    1 medium leek—trimmed, halved and thinly sliced
    2 tablespoons drained capers
    2 teaspoons fresh lemon juice, plus lemon wedges for serving
    2 tablespoons chopped flat-leaf parsley

    In a large nonstick skillet, heat the olive oil. Season the scallops with salt and pepper and cook over moderately high heat until golden brown on the bottom 4 minutes. 
    Now you are going to do what I like to call the "flip and tap". Turn the scallops over and cook for about 30 seconds just enough to make the scallops opaque throughout. Transfer to a platter and keep warm.

    Melt the butter in the skillet. Add the sliced leek and capers and cook over high heat, stirring, until the leek is crisp-tender, 2 minutes. Stir in the lemon juice and parsley and season with salt and pepper. Spoon the leek around the scallops and garnish with lemon.

      New England Clam Chowder from scratch


      There is something powerful about the moonlight. I think Kenny Chesney got it right in the song "When the sun goes down". Everything truly does get hotter. Most of the time, we snuggle in and don't bother going out in the moonlight. Occasionaly, we get out there and it is almost always magical. Especially along the water. Seeing the moon reflect off the water is a peaceful romantic thing. I highly recommend you get out there and experience it with your love. 

      Romantic Tip: Take a moonlit walk on the beach, bay, lake, or any other romantic place.

      Getting on the water for us, almost always means we will stop at the Brig for our favorite New England Clam Chowder. I have yet to find a better chowder here in San Diego. So I decided to learn how to make it from scratch like them at home. That's right. I mean completely from scratch. No canned clams here. It is actually easy, so don't be intimidated. 

      New England Clam Chowder from scratch

      2 pounds fresh clams 
      1/2 cup fresh water
      1/2 tablespoon extra virgin olive oil
      2 ounces bacon cut into 1/8 in. slices
      1/2 medium onion minced
      1 tablespoon flour
      1 1/2 cups milk
      1/2 lb. potatoes of your choice cut into small cubes
      1/2 teaspoon fresh marjoram minced
      1 bay leaf
      2 Tbsp butter

      The day before: As soon as you bring your clams home from the store wash the clams with cold water and then put the clams in a bowl with enough salt water to cover the clams ( it should taste like the sea). 
      Put the bowl in your refrigerator. Over the next 24 hours your clams will do their thing and siphon in the clean water expelling most of the grit they hold between their shells. If your clams are really dirty, you may need to change the water periodically.

      In a wide pot or sauté pan with a lid, add the clams along with 1/2 cup fresh water. Cover and steam over medium high heat until all the clams have opened. 5 - 10 minutes. Remove the pot from the heat and uncover. 

      Remove the clam meat from the shells and transfer to a bowl. Discard any unopened clams. Once all the clams have been shelled, slowly pour the clam stock over the clams, leaving the last tablespoon or so of stock along with any grit in the pot. Wash the pot out. 

      Agitate the clam mixture to allow any sand to settle to the bottom of the bowl, then let it sit for a minute to allow all the sand to settle to the bottom. Use your fingers or a slotted spoon to scoop the clams off the top of the liquid being careful not to disturb the sand at the bottom. Once you have all the meat separated, give the stock a few minutes to settle, then slowly pour the clam stock into a 2 cup liquid measuring cup, leaving the last bit of stock and any grit behind. You should have 2 cups clam juice, if you have less, add water to make 2 cups. 
      Add the olive oil and bacon to the clean pot and fry until most of the fat has rendered from the bacon and it is starting to brown ( but not until its crisp). 
      Add the onions and sauté until the are tender and browned. Add the flour and continue frying for 1 minute. 

      Turn off the heat, then add the clam stock and milk. Whisk together to dissolve the roux, and then add the potatoes, marjoram and bay leaf. Put the pot over medium heat and bring the pot to a low simmer. Do not let the soup boil. 

      When the potatoes are tender, remove the bay leaf and return the clams to the pot. Once the clams have reheated the soup is done.

      Asian Fish Sandwich


      Sometimes it is hard to stay away from all the fast processed food out there. My husband and I have not eaten out, unless it is an organic farm to table restaurant, in a long time. Because I am so in love with my man, I want him around. I make sure he gets "real food" to eat. Not the chemically laden, genetically modified, processed food you get at most restaurants. 


      So I have been recreating our comfort foods at home. I have been missing a good crispy fish sandwich for some time. It was time for me to create one, and this one did the trick. Way better than anything I have been served in a restaurant, and because it was made from scratch with wholesome ingredients, I didn't feel gross after I ate it.  I made them into sliders for easier eating. They are divine, I hope you try them!


      Asian Fish Sandwich

      For the slaw
      1 1/2 Tablespoons Rice wine vinegar
      1 Tablespoon Low Sodium Soy Sauce
      1 Tablespoon Peanut Oil
      1/4 Tablespoon Sesame oil
      1/4 Tablespoon Honey
      1/4 Tablespoon Fresh lime juice
      1 pinch Cayenne pepper
      1 pinch Red Pepper Flakes
      1 pinch Salt and pepper to taste
      1 cup Shredded Cabbage


      flour dredge: 1/4 cup flour, 1/2 tsp salt, 1/4 tsp pepper
      2 eggs
      Breading:
      1 cup panko breadcrumbs

      1/2 teaspoon ground ginger
      1/2 teaspoon salt
      1/4 teaspoon paprika
      1/8 teaspoon pepper


      1/2 pound fish fillets. I used snapper, but mahi, halibut, or any whitefish will work
      2 Tablespoons butter 
      1 Tablespoon olive oil


      For the Yogurt Sauce:
      1/4 cup kefir cheese (spreadable greek yogurt)
      1 Tablespoon dill pickle juice

      1/2 teaspoon ground ginger
      1/4 teaspoon hot sauce


      6 dinner rolls of your choice
      Directions:


      Toss the panko crumbs with ginger, salt, paprika, and pepper.


      Cut the fish filets to fit on your dinner rolls. 

      Prepare a dipping station.  One bowl with the flour dredge mixed together. One bowl with your eggs whipped. One larger bowl with the breading. 
      Start by dipping your fish in the flour and coat on each side.
      Next dip in the eggs.
      Lastly, coat the fish in the breading mixture. 
      Melt 2 Tablespoons butter and one tbsp olive oil in a skillet and add fish, cooking each side until browned, turning once.


      Meanwhile, prepare sauce. Mix together all yogurt sauce ingredients in a small bowl and set aside. 

      When fish is almost done, prepare your buns.  Spread each bun with yogurt sauce mixture. Place cabbage slaw on each bun. Top with fish fillet. 
      Dabble a little more of the sauce on the top bun and top the fish. 
      Enjoy!

      Leftover Turkey and Seafood Paella

       Leftover Turkey Paella

      I hope everyone had a spectacular Turkey day. I was too busy eating so I unfortunately don't have any photos of the spread. *sadface* And I'm still recovering from my food coma. As for the actual turkey, I've never been too crazy about it the day of but I do love the leftovers. Aside from the always glorious post-Thanksgiving sandwich, the possibilities for the turkey are endless: soups, chilies, stir fries, casseroles, etc.

      A paella is a little like a casserole in the sense that it is often served in the same vessel it's cooked in. I've adapted this paella recipe for leftover turkey but leftover roast chicken would work just as well. This recipe is made in a 6 quart Dutch oven because I don't have a paella pan nor do I have a open fire of orange branches and pine cones so I did the cooking in the oven.

      Leftover Turkey and Seafood Paella
      1 cup chicken or turkey stock
      1/2 teaspoon saffron threads, crumbled
      1 pound seafood of choice or a mixture of shrimp, peeled and deveined, scallops, or squid
      1 red bell pepper, cut into 1/2 inch wide strips
      Olive oil
      8 or 9 medium garlic cloves, minced or pressed through a garlic press (2 generous tablespoons)
      3 to 4 cups leftover turkey, coarsely shredded or chopped
      8 ounces Spanish chorizo (can sub fresh chorizo or Portugese linguiça), sliced in half lengthwise then cut into 1/2 inch thick crescents on the bias
      1 medium onion, diced
      2 cups Valencia or Arborio rice or another short grain rice
      1 14.5-ounce can diced tomatoes, drained and chopped
      1 cup dry white wine
      2 dried bay leaf
      Salt and ground black pepper
      1 dozen or so mussels, scrubbed and debearded
      1/2 cup frozen peas, thawed
      1/4 C chopped fresh parsley leaves
      1 lemon, cut into wedges, for serving

      Adjust an oven rack to the lower-middle position. Preheat the oven to 350 degrees F.

      Heat the turkey broth in a small saucepan or in the microwave until hot and steaming but not boiling. Add the crumbled saffron to bloom and set aside.

      Heat 2 teaspoons of oil in a large Dutch oven over medium-high heat until the oil is shimmering but not smoking. Add the pepper strips, stirring occasionally, and cook about 3 to 4 minutes or until the skin starts to blister and turn spotty black. Transfer the pepper to a small plate and set aside.

      Turn the heat down to medium. Add 2 teaspoons of oil in the now empty Dutch oven and cook the chorizo until it starts to brown and fat begins to render, about 4 - 5 minutes. Add the onions and cook until the onions are soft, 3 - 4 minutes. Add the garlic and cook until fragrant, about 30 seconds. Then add the rice and stir until the Dutch oven contents are evenly mixed. Add the drained and chopped tomatoes, white wine, turkey stock and saffron mixture, bay leaf, and 1/2 teaspoon of salt and pepper and bring to boil stirring occasionally.

      Cover the pot and transfer the pot to the oven and cook until the rice has absorbed almost all the liquid, about 15 minutes.

      After 15 minutes, remove the pot from the oven, mix in the cooked leftover shredded turkey and shrimp. Arrange the mussels hinged-side down into the rice, arrange the bell peppers in a pinwheel pattern. Cover and return the pot to the oven and cook until shrimp are opaque and mussels are opened, about 10 minutes.

      Scatter the peas on top, cover, and let the paella stand for 5 minutes. Discard any mussels that haven't opened. Sprinkle with parsley and arrange lemon slices on top or serve them separately.

      Crab Cakes

      Ginger Lime Dungeness Crab CakeMmm mm! 4 oz. crab cake with Israeli couscous (our current obsession) cooked in crab stock.

      I’m back! I spent the last month working at a clinic in the coastal fishing town of Westport, WA. I had some of the best seafood ever while I was down there – crab, salmon, tuna, spot prawns all fresh off the fishing boats. Before heading back to Seattle, K., the gal I was staying with, hooked me up with 6 Dungeness crabs to take home. Whoohoo! I also had the clams we dug up the day before, salmon a neighbor brought over from his fishing, and blueberries I picked from the shrubs outside the house. It was some seriously sweet loot to take home.

      My dad is in town and Dungeness crab is his favorite. We feasted on steamed crab with fresh ginger spiked black Zhejiang vinegar for dipping. I cleaned and picked out the meat from the leftover crabs for crab cakes. Dungeness crab is one of the meatiest crabs but even so, it took two very large crabs to yield one pound of crab meat. Jumbo lump Dungeness crab meat goes for around $25 a pound at my local fish market. Pretty darn steep in my book but it takes about three to four pounds of whole crab to yield a pound of crab meat and then factor in the time spent to get the crab out of the shell, the price is understandable.

      Too many recipes out there have all sorts of fillers added to the crab – onion, bell pepper, even celery (blech), and calls for way, way too much bread crumbs. You end up with an onion flavored hockey puck. No thank you! The best crab cake in my book is made with as much crab meat as possible, no veggies, and minimal bread crumbs. I use panko because it’s light and airy and won’t weigh the crab down. Don’t even think about using the stale stuff that comes in a cardboard canister. The most important step is to thoroughly chill the cakes for at least an hour so they get a chance to set up in the fridge, otherwise the cakes will fall apart in the pan.


      Ginger Lime Dungeness Crabcake

      Ginger Lime Crab Cakes
      1 lb jumbo lump crab meat
      1 egg
      2 Tbsp mayonnaise
      2 Tbsp chopped green onions, green parts only (approx 3 green onion tops)
      2 Tbsp chopped parsley
      1 Tbsp juice (approx from half a small lime)
      1 Tbsp sweet relish
      1 tsp Dijon mustard
      1/2 tsp grated fresh ginger
      1/2 tsp lime zest (approx from half a small lime)
      1/4 tsp smoked paprika
      1/4 tsp black pepper
      Optional: dash of fish sauce
      1/4 C panko bread crumbs and more to bread

      Vegetable oil to fry 4 – 5 minutes on medium heat


      Pick over the crab meat and discard any pieces of shell. Drain the crab meat on a few sheets of paper towels to soak up any excess moisture. You may have to gently squeeze the crab meat to remove excess liquid (you don't want to go overboard and have it end up bone dry either).

      In a small bowl, whisk all of the ingredients together except for the panko and crab meat and mix into a smooth sauce. Pour over the crab meat and add the panko bread crumbs. Gently fold together the crab, sauce, and bread crumbs. Try to keep the large crab meat pieces intact while mixing.

      Divide the mix into 4 and squeeze the mixture tightly together to form a 3 – 4 inch patty that’s roughly 3/4 inch thick. Put the crab cakes on a plate and cover with plastic wrap. Chill for at least an hour, up to overnight.

      Pour some panko onto a plate and bread both sides of the crab cake with the bread crumbs.

      Heat 2 tablespoons of vegetable oil in a nonstick skillet over medium heat. Fry the crab cakes 4 – 5 minutes on one side then carefully flip and continue to cook for an additional 4 – 5 minutes. If the crust is browning too fast, turn the heat down. Frying the crab cakes slowly ensures that they are heated through by the time the crust get crisp and golden brown. Resist the urge to flip the cakes more than once because they are more likely to fall apart with repeated flipping.

      Serve with dipping sauce of your choice.

      Sriracha Mayonnaise
      2 Tbsp mayonnaise
      2 tsp Sriracha
      1 tsp lime juice
      1/4 tsp brown sugar
      1/4 tsp fish sauce

      Whisk all of the ingredients together in a bowl.


      LA Trip and Bibimbap

      Korean BBQ in Korea Town LA
      Steven and I went on a short, laid back trip down to LA two weekends ago where we didn't do much but eat, our kind of vacation. It's ridiculous how much good food there is down in SoCal.

      First stop: xiao long bao. I’d been dying for a fix since my last Vancouver, BC trip. Steven and I were debating if we should visit Din Tai Fung since they’re world renowned and we’d be within 10 minutes of the only North American branch. After asking both Steven’s sister who’s eaten there and Wandering Chopsticks, we heard that the wait is too long, the dumplings are tiny and overpriced so we decided it wasn’t worth it. We love our soup dumplings but we’re also poor students.

      Instead, we visited both Mei Long Village and JJ's based on Wandering Chopsticks’ recommendations. The two restaurants are in the same complex, literally 30 feet away. Maybe we went at an off time, but the pork xiao long bao at Mei Longs barely had any soup. I was pretty bummed. The meat and the soup, albeit very little, was flavorful. The crab dumplings were, however, very mediocre just like WC said. We paid our bill and went to JJ’s, 2 shops away. Their pork dumplings had sooo much more soup. In the end it was a tossup for the pork soup dumplings, Steven preferred the flavor of Mei Long's, I preferred JJ. The crab dumplings at JJ were hands down much better, way more crab flavor and soup. Again just echoing what WC wrote in her original posts about the two dumping houses. The crab dumplings are definitely worthwhile but don’t bother with the sheng jian bao. They’re way too bready and have no soup. For sheng jian bao, WC recommended Kang Kang food court, which we went to later that night for shaved ice but didn’t have enough stomach room left for sheng jian bao.

      Later that night, we visited SoCal’s famous Pinkberry. The original flavor is definitely the best. The original with raspberries, almonds, and chocolate made our night. Pass on the green tea froyo, it had barely any matcha flavor and it just didn't taste right. We recently tried some froyo at a place near UW campus and it didn’t come anywhere close to the wonders of Pinkberry. I have a feeling I’m gonna need a fix in the near future.

      At around 10pm we met up with WC, who took us to her favorite Hong Kong café, Baccali. Milk tea plus condensed milk with endless refills, Malaysian style roast chicken with curried rice, salted fish and chicken fried rice, deep fried chicken wings, and beef chow fun. It was a diverse array of food but the concept works and tastes even better late at night. Steven and I ate so much, we were in pain for a bit. I think it was the free tea refills that did us in.

      We started Day 2 off with lunch at In-n-Out. Animal style cheeseburgers and well done fries. The burgers were delicious and ridiculously cheap! I was expecting the “well-done” fries to be extra crispy but still fluffy on the inside, but these were fried all the way through so they just tasted dry and stale. I’ll skip these next time and just get the regular fries.

      For dinner, we drove to Koreatown for Korean BBQ at Chung Kiwa. The seafood pancake was chock-full of delicious seafood but way too pricey at $18. The black angus kalbi and spicy pork (daeji bulgogi) were both very tasty. I liked the rice noodle sheets for wrapping the beef but Steven and I were more used to lettuce leaves. The waitstaff are very attentive and continually checked on us and cooked our food, even though we didn’t understand a word of Korean.

      It was a delicious, calorie-filled trip but after 2 days of LA smog, it was good to be back home in Seattle. Thank you to Wandering Chopsticks for being our fearless leader at Baccali and Jen of Use Real Butter for your great restaurant list, I wish we had more time to check out all the fantastic places you recommended.

      Now for a short recipe.
      Bulgogi Bibimbap

      I think the most appropriate recipe to follow this trip report would be the bulgogi bibimbap photos I took over a month ago. My favorite is the dolsot bibimbap, bibimbap served in a big hot stone bowl. The crispy rice crust that forms along the side of the bowl is the best part. I have no idea where to buy those cool bowls and it’s probably too much trouble to mess with at home so I’ll leave that to the pros. Bibimbap literally means mixed rice and stirring it up is definitely the best part and looks even more delicious.

      Salmon Bibimbap

      I normally throw bibimbap together and have no coherent recipe. I made it again yesterday and I’ve come to the conclusion that I probably won’t ever write down an exact recipe because it’s more work to get the exact measurements than to just wing it and throw stuff together. Cooked zucchini, grated carrot, leftover meat or tofu, steamed rice, fried egg, and bibimbap sauce are the bare minimal. It only takes me 15 minutes to make a bare bones version because I usually don’t go all out and make fresh bulgogi or marinated bean sprouts. Yesterday I covered a small 8 oz. salmon fillet with some the same marinade I use for kalbi, and roasted it in the toaster oven. Prepare as many of the sides as you like, it would take way too much time to make them all.

      Bibimbap – Korean Mixed Rice
      Steamed rice
      Browned ground beef or tofu with a little soy sauce, sugar, and garlic, leftover bulgogi, spicy pork bulgogi, or kalbi
      Kimchi
      Grated carrot
      Grated daikon
      Zucchini, julienned and sautéed with salt in a little vegetable oil
      Button mushrooms or shiitake mushrooms, sliced and sautéed with salt in vegetable oil, finish with sesame oil drizzle
      Seasoned beans sprouts
      Spinach
      Seasame seeds for garnish
      Fried egg for each serving
      Bibimbap sauce

      Bibimbap Sauce
      Gochujang (or substitute Szechuan hot bean sauce – dou ban jiang)
      Mix in sesame oil and thin with a little water
      Optional: honey + rice vinegar to taste

      Pan-Seared Scallops and Leek Risotto (and Blackberry Vinaigrette)

      Scallops and Leek Risotto

      jump to the new blog for more risotto
      Leek and Bacon Risotto
      *note: omit the bacon for a vegetarian version

      2 slices regular thickness bacon or 1 slice thick cut bacon *omit and replace with 1 Tbsp of vegetable oil for vegetarian
      1 leek, white and light green part only thinly sliced and washed
      1 C arborio or carnaroli rice (do not rinse!)
      1/4 C dry white wine
      2 1/2 - 3 C homemade chicken stock
      1/4 C freshly grated Parmesan
      Freshly ground black pepper to taste
      Salt to taste
      1 Tbsp butter

      In a small saucepan, bring the stock to a low simmer and keep it warm.

      In a large heavy bottomed saucepan or Dutch oven, cook the bacon over medium low heat until crisp and the fat has rendered. Turn up the heat to medium and add the leeks and a pinch of salt. Cook until the leeks have softened. Add the rice and cook the rice until the rice is evenly coated in the fat and toasty. You will be able to see an outer opaque ring around a white center on the rice grains.

      Add the white wine and cook until it has absorbed. Reduce the heat to medium low and add a half cup of the chicken stock and freshly ground black pepper to taste. At a low simmer, cook the rice, while stirring continuously, until all of the stock has been absorbed. Add another half cup of stock and stir continuously. Repeat adding the stock and stirring continuously until the rice is al dente. You may not need all of the stock, or if you find yourself running low on stock, use some hot water. Start tasting the rice after 20 minutes of cooking. It should be tender with a slight firm bite in the center. When the risotto is finished cooking, take it off heat. It will be creamy, moist, and somewhat runny but it will thicken after adding the cheese and while it cools.

      Off heat, stir in the Parmesan and butter and taste for salt.


      Seared Scallop
      Made these for Valentine's Day. They're perfect on this risotto.
      Pan Seared Scallops
      3 - 6 Scallops per person
      Salt and Pepper
      Oil

      Keep the scallops in between two sheets of paper towels before you cook them. This will help absorb any moisture from the scallops. Season the scallops on both sides with salt and pepper.

      Heat a stainless steel or well-seasoned cast iron skillet over medium high heat and add a tablespoon of vegetable or canola oil.

      When the pan is hot, add the scallops, giving them about 1 - 2 inches of room in between each other. Cook them undisturbed for 2 minutes then using a spatula, gently flip the scallops to the second side, cook for another 1 minute or until the second side is nicely browned also. Take off heat and serve with your favorite side.


      Blackberry Vinaigrette

      For the salad mix in our CSA box, I made a blackberry vinaigrette with the blackberries I painstakingly picked last summer. I still have about a gallon of frozen blackberries and I better hurry up and use them before they start tasting like freezer. Wouldn't that be a waste! I mean, my sweat and blood went into picking those blackberries! This is a great summery, fruity dressing that really relies on fresh berry flavor.

      Blackberry Vinaigrette
      3 Tbsp fresh blackberry puree
      fresh lemon juice (to taste)
      1 Tbsp Dijon mustard
      3 Tbsp extra virgin olive oil (to taste)
      Salt and freshly ground pepper

      If your blackberries are very ripe, sweet, and potent, you can get away using just two tablespoons of puree and add some lemon juice for tartness. My blackberries were not picked at their absolute ripest so they were still on the slightly tart side and I didn't need to add any lemon juice at all. Don't add any acid in the the beginning and just taste as you go.

      Whisk the blackberry puree and Dijon together to mix, slowly whisk in some extra virgin olive oil until you get the consistency you like. Add lemon juice for additional tartness. Season with some salt and pepper.


      Valentine's Day

      Arboretum
      We went for a walk in the Arboretum. I have no idea what this is, but it sure smelled nice.

      For Valentine's Day, Steven and I did what we've done for the last three years, instead of going out for an overpriced and cliched meal, we stayed at home enjoyed a quiet and sweet dinner. I'm not a fan of Valentine's Day food because oh my god, everything is heart shaped! Just because the crabcakes are heart shaped does not make it romantic! And being surrounded by other couples cooing and swooning doesn't make it a special occasion, only awkward. Anyway enough ranting. I really love our Valentine's Day tradition. We started it not long after I began cooking so it's nice to see the meals getting better and better. This year, we really splurged and bought some really great ingredients - black tiger prawns, giant sea scallops, and organic ribeye steak. I really went all out this year because it just happened to be a long weekend after a grueling exam. It's a rare occasion to have so much free time to unwind and enjoy some great food for breakfast, lunch, and dinner.

      Garlic Butter Butterflied Shrimp
      Who needs lobster tails when you have prawns. Rawr! Roasted butterflied shrimp with garlic, lemon, parsley, and lots of butter.

      Seared Ribeye
      For Steven, it always has to be steak, specifically ribeye, cooked medium with mushroom sauce. We added a little blue cheese because according to Heston Blumenthal (our new chef idol), the nutty aroma is supposed to mimic the aromas from a long aging process. Hey, if it's good enough for Heston, it's certainly good enough for us. I also made some unbelievably delicious double cooked potatoes roasted in duck fat (also courtesy of Heston). Oh. My. God. They deserve their own post and trust me, it'll be worth it.

      Seared Scallop
      Typically I go with a seafood dish and this year I chose to make scallops. The last time Steven and I went out for dinner to a supposedly great local restaurant, Enotria, I was really let down with my scallop entree (and the restaurant overall, but I digress). The scallops arrived beautifully but deceptively seared because once I flipped the scallop over, the second side was completely colorless. I felt a little cheated! One side of the scallop was overly salted and the other side was completely bland. I dunno about you, but I prefer my food evenly salted and cooked. And the fact that I only got 3 scallops, pretty wimpy... Overall it was very disappointing for an entree that was nearly $20. So for Valentine's Day, I spoiled myself by cooking a generous 6 scallops (even though the picture only shows 3).

      Now just for kicks... let's revisit an old photo. Valentine's Day 2007.